This kit is simply outstanding! It is definitely one of my favorites ever. Full of awesome patterned papers from Pink Paislee and Bo Bunny and fun coordinating embellishments, this kit is sure to put you in holiday spirit! This kits contains the perfect supplies for several Christmas layouts and even includes the supplies and instructions to create an awesome Basic Grey star ornament! A fabulous kit add-on option is also available. Check out the projects I created with the kit and kit option below.
Sunday, December 6, 2009
Ribbon Flower Technique!
I had seen this technique various places before and decided to give it a try myself!

3. Once you have stitched along the whole side of the ribbon, take your ribbon and bunch it up on the thread.

4. Take both loose ends of your thread and tie them together so that the ribbon forms a bunched up circle.

5. Cut the loose ends of thread.

6. Now you have your “petals.”

7. Adhere your petals to your layout and then adhere your flower center.

8. Now you have a pretty ribbon flower!


Saturday, October 31, 2009
Lovin' the Crop Addict November Kit!
I had so much fun with this kit! It has such a variety of supplies that you can create so many different projects with it. It features papers from the Pink Paislee Twilight Collection and Dream Street Papers Urban Ink collection. And with a variety of Fall, Halloween and urban-themed embellishments from Making Memories, Heidi Swapp and Scenic Route you are sure to get a variety of pages out of this kit. Check out the seven layouts I created below!
Painted Journaling Block Technique!
Another scrappy friend posted this technique and I thought it was too cool not to share so here is my take on it!

1. Gather your supplies: Two colors of paint, brushes, small scrap piece of cardstock, and cardstock/patterned paper where your journaling block will go.

Crop Addict Manufacturer of the Month: Dream Street Papers
This month Crop Addict is featuring Dream Street Papers - one of my personal favorites! I had the opportunity to work with the Sam Collection which is such a fun twist on the traditional Autumn-themed supplies. With multiple designs of thick double-sided paper, chipboard alphas and embellishments and awesome rub-ons, this collection is perfect for all those Fall projects!

Stamping With Real Flowers Technique!
1. Gather your supplies: Flower (free of debris), acrylic paint, foam brush and non-textured cardstock.
 2. Paint your flower with a thin layer of paint. Stamp on some scratch paper first to test how much paint you want on your flower to achieve your desired result.
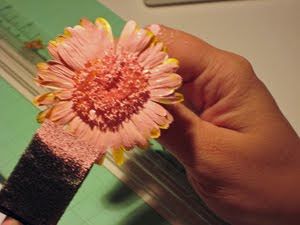 3. Stamp your image onto the cardstock.
 4. Now you have stamped flowers!

 NOTE: Leaves also would be good for this technique!
 2. Paint your flower with a thin layer of paint. Stamp on some scratch paper first to test how much paint you want on your flower to achieve your desired result.
 3. Stamp your image onto the cardstock.
 4. Now you have stamped flowers!
 NOTE: Leaves also would be good for this technique!
Saturday, September 26, 2009
Love the Crop Addict October Kit!
Debbie, you did it again. What a fantastic kit you put together this month! Full of cute patterned papers from Paper Trunk and Crate Paper and fun coordinating embellishments, this kit is sure to brighten your day! Although perfect for those all girly girl pages that I created for my baby cousin Cece's album, I used the kit to also create pages about a baseball outing, my scraproom and an All About Me reflection. I also got a cute greeting card out of it. Be sure to get your kit soon, because I have a feeling they will go fast!
Monday, September 14, 2009
The next Crop Addict cyber crop is coming up soon!

Join us Friday, October 2nd through Sunday, October 4th for a weekend jam-packed of awesome challenges, fun games and amazing prizes! Every two hours a new game and challenge will be posted so you'll want to make sure to check back often throughout the weekend. All the action can be found here on the Crop Addict forum. The fun begins at 6PM Eastern so get ready to scrap the weekend away for your chance to win one of the many prizes.
Monday, September 7, 2009
String Art Technique!
1. Gather your supplies: cardstock (or layout/card) where you want to place your string art, paper piercer, round brads, embroidery floss (divided into strings) or thread, pencil, scissors and shape template (if desired).
2. Using your pencil (and template), trace a star onto your cardstock.

3. Use your paper piercer to create holes at the points of your star.

4. Erase the tracing of the star.

5. Insert your brads in the holes at the points of your star and secure them loosely to the project.


6. Take a piece of floss and tie it around the bottom part of a brad.

7. Begin to wrap your thread between the brads to create your star shape. Vary which side of the brad you are wrapping to and from to give each line a slightly different path.

8. Secure the end of your floss by wrapping it a couple times around one of the brads.

9. Cut off the loose strands of floss.
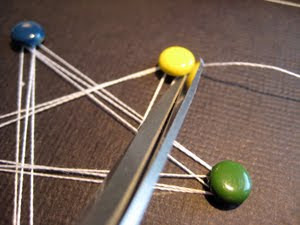
10. Secure your brads tighter to your layout.
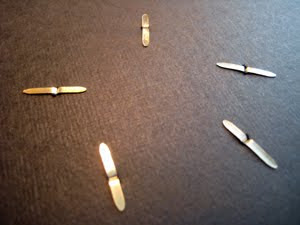
11. Now you have a cool String Art Star!


NOTE: Stars lend themselves well to this technique, but you can also try diamonds, rectangles, circles, arrows or even letters!

3. Use your paper piercer to create holes at the points of your star.

4. Erase the tracing of the star.

5. Insert your brads in the holes at the points of your star and secure them loosely to the project.


6. Take a piece of floss and tie it around the bottom part of a brad.

7. Begin to wrap your thread between the brads to create your star shape. Vary which side of the brad you are wrapping to and from to give each line a slightly different path.

8. Secure the end of your floss by wrapping it a couple times around one of the brads.

9. Cut off the loose strands of floss.

10. Secure your brads tighter to your layout.

11. Now you have a cool String Art Star!


NOTE: Stars lend themselves well to this technique, but you can also try diamonds, rectangles, circles, arrows or even letters!
Saturday, September 5, 2009
The Crop Addict September Kit is so much fun!
You have to check out the September Kit from Crop Addict. This kit is prefect for those travel photos, especially those focused around the modes of transportation we use to travel. The kit is full of vintage-style travel products including amazing papers from Graphic 45 and some pretty Pink Paislee papers as well. Check out the layouts I created using this kit below and you can see more great work from the rest of the Crop Addict design team in the September 2009 Kit Gallery.
Pink Paislee: Crop Addict Manufacturer of the Month!
I love Pink Paislee - plain & simple. And what's a better excuse to use their products then for a contest? So be sure to head over to Crop Addict and check out the manufacturer of the month contest for September. All you need to do is create a layout using 70% Pink Paislee products and upload it into the Crop Addict Pink Paislee gallery. Here are some layouts I created using the Pink Paislee Fascinating Collection.


Monday, August 31, 2009
My Treasured Hunt Round #4 Layout.
So I made it to round #4! I am so excited to have made it this far and the challenges just keep getting harder. This round the requirements were to create a one or two page paper (no digital) layout with one photo only, real stitching (no faux), at least three leaves, some sort of recycled packaging and the phrase "I am not willing to..." in the journaling.
Here is my take on the challenge...

Monday, August 24, 2009
My Treasured Hunt Round #3 Layout.
So here it is...my entry for Round #3 and I think it's my favorite so far. This week's challenge was to create a one-page paper (no digital) layout with one or two photos (no more, no less), paint, ric-rac, at least one handmade flower made by you and the phrase "I'd rather..." somewhere in the journaling. I really enjoyed this one and I think it's my favorite of the three so far. Hope you like it!

This week's Crop Addict challenge: Back To School!
It’s that time of year again! So let’s see those layouts all about going back to school. And, if you don’t have children, such as myself, think outside the box and create a layout about yourself when you were in school or a layout about higher education. My example is all about my husband going back to school to earn his MBA:
Upload your layout into the August 24th - 31st Challenge Gallery by midnight PST on August 31st and post a link here in the forum.
Monday, August 17, 2009
My Treasured Hunt Round #2 Layout.
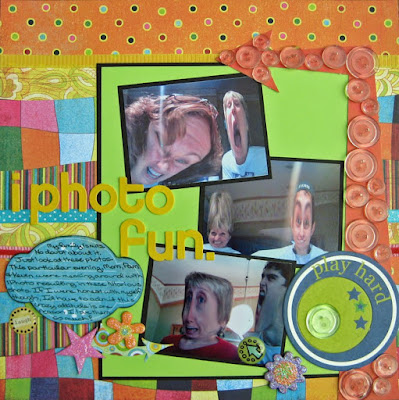
Well, I made it past round #1 and had the opportunity to work on round #2 for the Treasured Hunt. The challenge requirements for this challenge were to create a one-page paper (no digital) layout with at least three photos, 2 colors of cardstock (no more, no less), 4 different patterned papers (no more, no less), at least one arrow, buttons or beads and somewhere in the journaling you had to have the phrase "if I were honest with myself." Here is my take...
Monday, August 10, 2009
Shape It Up Layout Contest at Serendipity Scrapbooks!
Check out the monthly contest over at Serendipity Scrapbooks (sponsored by Core'dinations Cardstock)! The grand prize is your choice of one of Serendipity Scrapbooks awesome kits plus a package of Core'dinations Cardstock (Value $75). The runner up prize is a Core'dinations Cardstock pack (Value $40). The requirements for this contest are simple...
- Create a layout using shaped die cut paper as the background.
- There must be a clear title.
- There also must be some cut work and some height by using dimensional adhesive.
- Must include either hand or machine stitching.
Your layout can be any subject you like. The contest ends August 31st, 2009 at midnight. Only 1 layout per person. Read the rest of the rules here.
My Treasured Hunt Round #1 Layout.
Well, the Treasured Hunt (Treasured Scrapbooking's big yearly contest) is in full force and I have completed my first round layout. The requirements were to create a one-page paper layout with only one photo, at least one circle larger than 3", torn paper and the words "I wish someone had told me that..." somewhere in the journaling. Here's my take on it...
Now time to wait until those moving on are announced tomorrow - wish me luck!
And while your at it, check out the Crop Addict Monthly Challenge!
I am honored to be the featured DT member for August and I have a fun monthly challenge for you!
Have you checked out the Totally Technique forum at Crop Addict? If not, click here! The Design Team posts lots of fun scrappy techniques in this forum on a weekly basis and the inspiration is amazing! So my challenge for you this month is to create a layout using one of the techniques found in the Totally Technique forum. When you link your layout back to the monthly challenge thread, be sure to tell us which technique you used! Here’s my example using the Bellagio Flowers technique I posted a couple months ago.

Upload your layout into the August DT challenge gallery by midnight PST on August 31st and post a link in the August DT challenge forum also.
Have fun!
This week's Crop Addict challenge: Fussy Cutting!
There are so many awesome papers out there on the market that are begging to be cut up and used as prominent parts of gorgeous layouts. So for this week’s challenge, let’s see some fussy cutting. You must include at least three fussy-cut pieces of paper on your layout and you have to use foam adhesive to give these pieces of paper some dimension! Here’s my example:
Upload your layout into the August 10th-17th Challenge Gallery by midnight PST on August 10th and post a link in the August 10th - 17th weekly challenge forum also.
Tuesday, August 4, 2009
Masking With Stamps
It's technique time again. This time I'll be reviewing how to mask with stamps!
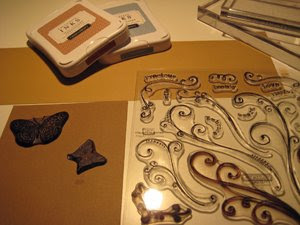
2. Stamp the design you want to mask on the spare cardstock. Don’t worry about the image being perfectly stamped – it’s going to serve as your mask.

3. Cut out your mask(s) using your micro-tip scissors. Be precise!

4. Adhere your masks to your cardstock with the repositionable adhesive. Proceed to stamp your background image over your mask(s).

5. Remove your masks carefully and then stamp the same image you used to create your mask in the negative space left by the mask.

6. Now you’ve got a masked image over a background stamp without the two overlapping!

7. Use your stamped design on a project!

Subscribe to:
Posts (Atom)


