
Hi everyone! Today, I'm sharing a couple of Project Life spreads I made using my Jade Core Kit and a bunch of fun Elle's Studio and Studio Calico products from the Frosted Designs store! These have got to be two of my most favorite manufacturers to turn to when working on Project Life. Why you may ask? Well, first off, they make lots of relatively "flat" embellishments which are best when working with pocket-style page protectors. Second, they make lots of stuff that is perfect for scrapbooking the "everyday." And third, their products coordinate so well with many of the Project Life Core Kits out there! Are you thinking about starting Project Life and want to get yourself a Core Kit? If so, check out the beautiful Azure Core Kit available in the Frosted Designs Store! I'm thinking I may have to pick up this kit for my 2015 album!
Now, a bit of a disclaimer that I've shared with you all before. I am waaaaay behind in Project Life. But, you know what? That's okay! I keep a Project Life planning journal where I jot down notes each day and then at the end of each week, I write up my weekly recap and create a folder on my computer for each week where I save the recap and any photos I want to include on that week's spread. I also have an expandable file where I keep any mementos I plan to include in my album. So, by staying organized this way, whenever I do have the time to go back and work on Project Life, it makes assembling a week's spread a breeze...no matter how long ago it was.
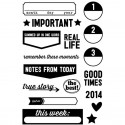
Now onto my first spread I'm sharing today - Week 2 of 2014. It's a combination of my Jade Core Kit, printables found online and Elle's Studio and Studio Calico goodies from the store. Each of my Project Life spreads contains four key elements: (1) a weekly title card that is consistent in design each week, (2) a weekly recap card created on my computer using the same font, (3) at least one "filler" card that is light on photos and text to allow a place for the eye to rest and (4) several cards from my designated yearly Core kit to keep my album cohesive.
Now, a bit of a disclaimer that I've shared with you all before. I am waaaaay behind in Project Life. But, you know what? That's okay! I keep a Project Life planning journal where I jot down notes each day and then at the end of each week, I write up my weekly recap and create a folder on my computer for each week where I save the recap and any photos I want to include on that week's spread. I also have an expandable file where I keep any mementos I plan to include in my album. So, by staying organized this way, whenever I do have the time to go back and work on Project Life, it makes assembling a week's spread a breeze...no matter how long ago it was.
Now onto my first spread I'm sharing today - Week 2 of 2014. It's a combination of my Jade Core Kit, printables found online and Elle's Studio and Studio Calico goodies from the store. Each of my Project Life spreads contains four key elements: (1) a weekly title card that is consistent in design each week, (2) a weekly recap card created on my computer using the same font, (3) at least one "filler" card that is light on photos and text to allow a place for the eye to rest and (4) several cards from my designated yearly Core kit to keep my album cohesive.

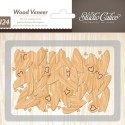
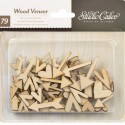
And let's take a closer look at the left side. I am in love with the Project Life photo overlays and used one here on the photo in the upper left. I added the circle die-cut sentiment on top of it for a little something extra. Oh, and those Printshop wood veneer hearts? LOVE. A new favorite product!

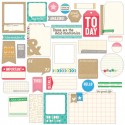
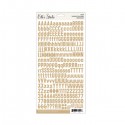
And here's the right side of the spread closer up. I really love both the kraft Polaroid frame and the 4x6 "Good Life" tabbed card on this spread. They are both part of the Elle's Studio Everyday Moments Bits & Pieces pack. I also really love the quality of the Elle's Studio alpha and number stickers - I picked them up in kraft, teal and dark gray!

Now it's onto my second spread of the day - Week 3 of 2014. Besides the four key elements mentioned above that I include on each Project Life spread, I also have a tendency to gravitate towards "hybrid" scrapping when working on this project. I have a decent collection of digital overlays and such that I'll add to my photos in Photoshop Elements before printing. But, I always try to make sure the majority of my page contains traditional scrapbooking supplies because they have the depth and texture that no digital supply can ever match.

Here's a better look at the left side of my page. How perfect does that "Today" tag from Elle's Studio match my weekly title card? Talk about a happy accident. Again, I am loving the Project Life overlays. Here I added a caption on top of the overlay using the Elle's Studio alpha stickers.

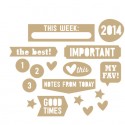
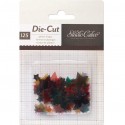
And here's the right side of Week 3. The Elle's Studio Everyday Moments Bits & Pieces pack is chock full of some seriously cute, versatile die-cuts! Both the good stuff tabbed hexagon and pink star circle on this page came out of that pack. Oh, and the Studio Calico Thataway plastic stars I used on both sides of this spread are the perfect finishing detail for Project Life - a pop of color and a flat embellishment! The center column of professional photos taken of our house during the selling process really shows where I utilize digital overlays. "Let's Sell This Home!" was added to the photos digitally.

I also included a 7x5 insert on this spread. I wanted to include the full email that I sent to our Portland friends announcing our intended move, but I couldn't shrink it down to fit on a 4x6 journaling card without it becoming unreadable. So, I decided I would include it as an insert. But, with that, I needed to put something on the other side of the insert, so I decided to include one of the shots of the front of the house that the professional photographer took. And actually, with the way the insert lies on the spread, and the way I included the text, using the same font, on all the house photos, it works really, really well!

And here's the spread showing the backside of the insert, with the email.

And here are a few closeups from the two spreads...

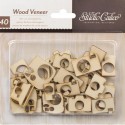
Wood embellies from the Elle's Studio Good Times wood veneer pack and a partial shot of a Project Life Overlay.

Die-cut tab from the Elle's Studio Everyday Moments Bits & Pieces pack and Studio Calico Thataway plastic stars.

4x6 card from the Elle's Studio Everyday Moments Bits & Pieces pack and the Elle's Studio kraft alpha stickers.

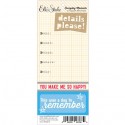
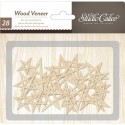
Die-cut sentiment from the Elle's Studio Everyday Moments Lil' Snippets Remember sheet and Studio Calico Printshop wood veneer stars.
Working on these two spreads (and my Week 1 spread that I created for the BINGO challenge) have completely revitalized my mojo for Project Life. Boy, I missed working on this project and am so happy that these fun products from Elle's Studio and Studio Calico helped spark the creative bug in me again! If you are a Project Lifer, or would like to be, I highly recommend checking out all the Project Life products in the Frosted Designs store!
Products used from the Frosted Designs store:

1 comment:
These layouts are so cool love what your doing with the Jade kit (one of my favorites) It's nice to know that I'm not the only one behind a bit
Post a Comment