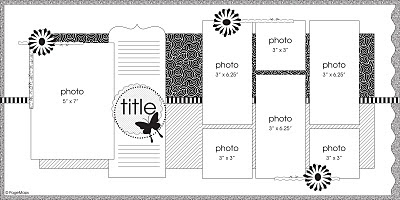
Time to show off another awesome sketch - this one from Creative Scrappers! I had a great time with this sketch. It was perfect for using up the strips of scraps I had from this Dream Street collection. And this collection was perfect for the very pink & red heavy Christmas photos.
Here's the sketch....
And here's my layout...
Monday, December 19, 2011
Sketchy Thursday 12/15/11 Sketch
I had a lot of fun with this week's Sketchy Thursdays sketch. It was perfect for scrapping these adorable photos for Alexis' album - a reenactment of the a scene from Star Wars Empire Strikes Back.
Here's the sketch...
And here's my take on it...
Tuesday, December 13, 2011
Sketchabilities Sketch #60
I had so much fun with this sketch from Sketchabilities!

I used the sketch to once again complete a page for Alexis' first year album. I need to get it done by Christmas and I still have 12 layouts to go! Yikes! But this sketch was great for these super cute pictures of Alexis and her brother Jack paying tribute to Run DMC. I also went stash diving again and used up some old Dream Street Papers (wish they were still around), some Scenic Route chipboard stars (wish they were still manufacturing too) and a total blast from the past that I still love - eyelets! I am really happy with the way this layout turned out!


I used the sketch to once again complete a page for Alexis' first year album. I need to get it done by Christmas and I still have 12 layouts to go! Yikes! But this sketch was great for these super cute pictures of Alexis and her brother Jack paying tribute to Run DMC. I also went stash diving again and used up some old Dream Street Papers (wish they were still around), some Scenic Route chipboard stars (wish they were still manufacturing too) and a total blast from the past that I still love - eyelets! I am really happy with the way this layout turned out!

Monday, November 28, 2011
My October Project 12 Layout!
FInished my October Project 12 layout tonight, just under the wire. It was nice to take a break from Alexis' album and scrap a layout for my own album. For this layout, I wanted a Fall/Halloween theme but didn't want it to overtake the page because the month was about so much more than Halloween. So I went with browns, oranges, black and green for the color scheme. I used neutral patterned papers and used only one Halloween embellishment. I am really happy with the way it turned out!



Cards Galore!
So I have been scrapping - not as much as I'd like but some. Recent projects include finishing Alexis' first year album by Christmas (over halfway there), our Orlando 2007 trip, various layouts for photos I have already printed and cards! Why cards? Well, National Cardmaking Day was last month and I have to desperately clean out my scrap paper file because it is ready to explode. I find making cards out of my scraps is the best way to purge that pile without just throwing everything away. So here are some cards I've made recently...

...and part of the swap was to lift the card we received....
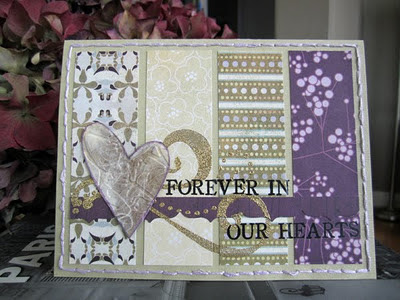
I used a sketch provided by Audrey at Memorable Seasons to create my first ever sympathy card...
And this was also created from a sketch provided over at Memorable Seasons...
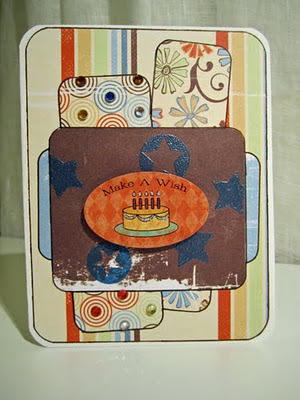
For a Dixie Pieces challenge last month (create a card with numbers on it)...

And another Dixie Pieces challenge to create a card with four buttons on it...

And here's the card I made for Laura during the Memorable Seasons card swap...


I used a sketch provided by Audrey at Memorable Seasons to create my first ever sympathy card...

And this was also created from a sketch provided over at Memorable Seasons...

For a Dixie Pieces challenge last month (create a card with numbers on it)...

And another Dixie Pieces challenge to create a card with four buttons on it...

And here's the card I made for Laura during the Memorable Seasons card swap...

And here's my first baptism card...
Sketchabilities Sketch #59
I had so much fun with this sketch from Sketchabilities! It was the perfect inspiration for completing this page for Alexis' first year album. It also felt really good to use up some old Bo Bunny papers I had in my scrap pile! And the papers coordinated perfectly with the Karen Foster Baptism stickers I had.
Here's my layout...
And the sketch...

Monday, September 19, 2011
Project 12: August 2011 Layout & Catch-Up Time!
So with all the craziness this summer, I fell behind with Project 12. Well, this weekend I not only completed my August layout well before the deadline, but I also caught up and completed the three months I missed! If you aren't participating in Project 12, it's never too late to start - just click here.
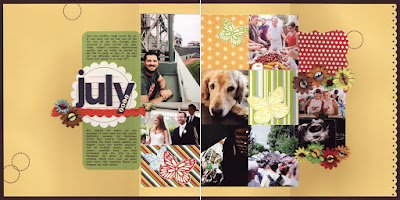
Here's my August layout. I stayed pretty true to the sketch but because it only called for three photos, I took one of the 6x4 photos and replaced it with three 2.5x4 photos just so I could fit more pictures on the layout while maintaining the integrity of the sketch. I also used up a lot of old supplies in creating this layout which felt really good!


And here are my three catch-up layouts for April, June & July. To see the rest of my Project 12 layouts for this year, click here!



Saturday, September 17, 2011
My new scraproom!
Well, I have taken a bit of a scrapbooking hiatus with everything that has happened this past summer but I am looking forward to getting back into the swing of things. I thought I'd start by updating my very neglected scrapbooking blog with some photos of my new scraproom.
This room is actually the third bedroom in our 1921 bungalow and is the first floor bedroom. It is right off the kitchen and is also attached to the first floor bathroom (which also has an entry to it off the hallway). In the first photo, the closed door to the far left is a closet (which Andrew uses for clothes since we have very little closet space upstairs), the open door is to the bathroom and the closed door on the right leads to the kitchen. The second photo was taken from the doorway to the kitchen. I didn't have to purchase anything new for the room and just made everything I already had fit into the space.
I actually had to reorganize a bit because I lost the white bureau I had in my previous room - there was just no space for it in this room. I needed to make sure I kept the center if this room open so that the futon could be used easily for guests. I really love my new room - especially the fact that it gets so much natural light and I have hardwood floors for easy cleanup.
Tuesday, July 26, 2011
“Fireworks” by Megan Smith
 1. Gather your supplies: Crop Addict July 2011 Monthly Kit, Crop Addict July 2011 Monthly Kit Option, four photos (one 4”x6”, one 3”x6”, one 3”x3”, one 1¾” x 1¾”), a thin-tipped orange marker, date stamp, black StazOn ink and various adhesives.
2. Use the yellow cardstock as your base. Use the orange thin-tipped marker to draw a thin border around the edge of your layout, approximately ¼” in from the edge.
3. Adhere your photos in a grid fashion starting with the 4”x6” photo so it’s 2½” from the bottom edge of your layout and 1½” from the left edge of your layout. Then, adhere the 3”x6” photo directly to the right of the first photo. Then, adhere the 3”x3” photo directly to the right of that photo and in line with its bottom edge. Next, adhere the small black frame to the smallest square photo and adhere it above the 3”x3” square photo so the frame edges are flush against the other two photos.
4. Add the “Boom” sticker to the bottom of the frame.
5. Add three strips to the bottom of your layout – one that’s the blue paper, one with the decorative grid tape and one with the navy blue border strip. They should all be varying lengths to add visual interest and one should touch the right edge of your layout.
6. Choose five fireworks stickers and adhere them to the blue paper. Fussy-cut them out. Adhere two near the upper left of your photo grid, one overlapping the upper right corner of your frame and two near the lower left center of your layout overlapping the decorative tape. Use dimensional adhesive on three of the fireworks for added visual interest.
7. Use the alpha stickers to add your title above the photos.
8. Take the small blue rectangle label and add your date to it using the date stamp and StazOn ink. Adhere in the lower right corner of your layout over the decorative grid tape.
9. Embellish your fireworks with yellow and orange eyelets and blue mini-brads.
“Smiles” by Megan Smith
 1. Gather your supplies: Crop Addict July 2011 Monthly Kit, Crop Addict July 2011 Monthly Kit Option, one 4”x6” photo, extra sheet of cardstock in any color, four border punches, a black journaling pen, circle cutter and various adhesives (including dimensional adhesive).
2. Adhere the patterned paper with the bike to the spare piece of cardstock for extra support. This is your base.
3. Cut a piece of the brown with blue polka dot paper to 11”x1½”. Cut a piece of the green on green circle patterned paper to 6 ¾”x 1½”. Use your circle cutter to cut a 4¾” diameter circle from the blue paper.
4. Take the three just-cut pieces of paper and one of the border die-cuts and layer them in the center of your layout, taking care not to cover the bike or polka dots on the background paper.
5. Adhere your photo over these layers.
6. Take four different My Minds Eye Papers and punch a different border strip from each one, each strip being about ¼” wide. Add one border strip to each side of the photo, trimming the overhanging edges to create a frame around your photo.
7. Embellish the upper left corner of the photo with a die-cut and title block. Use dimensional adhesive on the title block and add two red clips to it for extra detail.
8. Embellish the lower right corner of the photo with three die-cuts using dimension adhesive on at least one of the die-cuts.
9. For added detail, glue several of the metal rings to the polka dots on the background paper.
10. Add your photo caption to your layout using the black journaling pen.
Thursday, July 14, 2011
Check out the fun July Crop Addict Kit!
The Crop Addict July Rockets Red Glare monthly scrapbook kit features papers collections from My Mind's Eye and Basic Grey. Six coordinating sheets of Bazzill Cardstock are included. We've also added Making Memories Velvet alphabet stickers, a mini alphabet set, chipboard stars, acrylic stars, die cuts, rhinestone bling, chipboard frames, ribbon, Heidi Swapp slide clips, brads, and so much more!
Here are the projects I created with this month's kit...five layouts (including 2 double-page spreads), a card and I still have plenty of supplies left over for more!
Visit the Crop Addict gallery to see the rest of the Design Team's pages and projects.
Tuesday, June 28, 2011
Project 12: May 2011 Layout
I'm back on track for Project 12. After missing the April deadline, I managed to get my May layout done in the nick of time. I adapted this sketch to fit the majority of vertical photos I had. I also chose to use a mini Bingo card as my title block rather than a circle. I love the line of flowers in the lower right corner on the sketch so I made sure to keep that element as is. Since my photos had a variety of your basic reds, blues and greens, I used this trio of colors throughout my layout. Now it's time to backtrack and complete my April layout before I move on to June. If you aren't participating in Project 12, check it out here! It's never too late to start.


Tuesday, June 7, 2011
Katie's Bridesmaid Mini-Album
So I made this mini-album two years ago for my best friend Katie as a present from all her bridesmaids before she got married. I neglected to take photos of it then, so when we were back in town this past month, I had a chance to snap some photos of it. Better late than never right? TFL!
Monday, June 6, 2011
The All Boy Crop Addict June 2011 Kit is here!
The Crop Addict June Boys and Their Toys monthly scrapbook kit is chock full of some amazing all-boy products. This kit features papers from Carolee's Creations Adornit Father, Rumble, Motorcycle, and DIrt Biking Collections and Dream Street Papers Jack Collection. It also include a round die-cut sheet of paper from My Little Shoebox, a sheet of die-cut Bazzill cardstock and four more sheets of coordinating Bazzill cardstock. Embellishments include Alphabet Cardstock Stickers, Square Cardstock Stickers, Heidi Swapp Chipboard Theme Set, Coaster Photo Corners, Piggy Tales Taglets, Making Memories Velvet Sayings, Heidi Swapp Rubons, Making Memories Rubon Wordage, Die Cuts With a View Chipboard Stickers, Hampton Arts Studio G Clear Stamp, Hampton Arts Studio G Clear Stamp, die-cut tags, three feet of fiber and a Zutter Mini Album! All of this can be yours for only $50! Order yours now from the Crop Addict Store!

A fabulous kit option is also available that coordinates perfectly with the June Kit. This add-on option includes an outlined chipboard alphabet, Bo Bunny iCandy Brads and clear gear accents. This add-on is only $14. Get yours while supplies last!
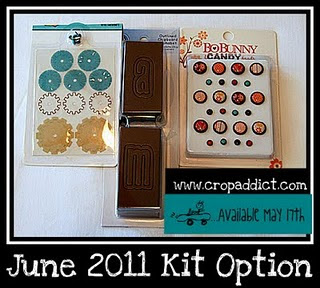
I had so much fun with all the masculine-themed products in this kit. I created five very different layouts with this kit - one about a crazy Red Bull dare devil event, one about an adorable baby boy, one about an unexpected visit with my brother-in-law, one about a pair of competitive cousins and one about a baby girl and her daddy (yes, this kit can even work for girl-themed pages!) I also had plenty of leftovers to create a set of Father's Day cards ready to mail out this upcoming week. Check out all these projects below!
Also, be sure to check out what the rest of the Crop Addict Design Team created in the Crop Addict Gallery!
Sunday, May 1, 2011
Check out the uber-girly Crop Addict May kit!
The Crop Addict May Thank Heaven for Little Girls monthly scrapbook kit features adorable double-sided papers from The Girls' Paperie (Girl Collection) and the Crate Paper (Paper Doll Collection). You'll also receive six coordinating sheets of Bazzill cardstock, a Making Memories Puffy Alphabet, Die Cuts With a View Rub-on Ink Effects, Crate Paper Stickers, Making Memories Velvet Sayings, Scenic Route Chipboard Buttons, Making Memories Rubons, Maya Road Ruffle Blossoms, Heidi Swapp Florals, Making Memories Embossed Stickers, Bazzill Library Pockets, Making Memories Velvet Brads, Maya Road Medallion Flowers, Maya Road Sheers, a Hampton Arts Studio G clear stamp set and Carolee Creations Adornit Mini Alphabet Stickers. All of this can be yours for only $48! Order yours now from the Crop Addict Store!
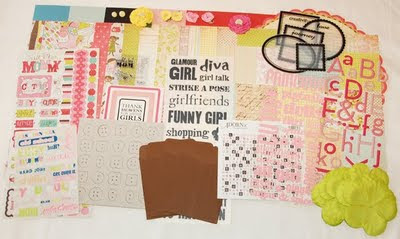
A fabulous kit option is also available that coordinates perfectly with the May Kit. This add-on option includes Crate Paper Sparkle Chips, Crate Paper Chipboard Accents (1/2 sheet), Creative Imaginations Fabrix and a Poly Flower Piece. This add-on is only $14. Get yours while supplies last!

I had such a blast creating with this kit. I made four all-girl layouts for my cousin-in-law's daughter's first year album; this was the prefect kit for completing those baby girl layouts. I also created a layout about another trip to the Rose Garden and a set of Mother's Day cards - so I am all set for when Mother's Day rolls around. Check out all these projects below!
Also, be sure to check out what the rest of the Crop Addict Design Team created in the Crop Addict Gallery!
Monday, April 11, 2011
"Brotherly Love"
 1. Crop Addict April 2011 Monthly Kit, Crop Addict April 2011 Monthly Kit Option, three photos (all 3”x3”), black thin marker, light blue & white baker’s twine, blue embroidery floss, red mist, dry embossing tool/template, a border punch, a 1½” circle punch, stapler/staples and various adhesives.
2. Use the green cardstock as your base. Use a black thin marker and ruler to add a simple thin-lined border all the way around the edge of layout, leaving about ¼” of space between the border and layout edges.
3. Trim a piece of the striped Dream Street paper to 12”x4¼”; make sure the stripes run vertically. Use a border punch to create a decorative edge along one 12” side. Adhere this piece of paper horizontally along your layout so it’s 4” from the bottom edge and the decorative edge is at the top. Add a border sticker running horizontally along your layout about 1/16” below this sheet of paper.
4. Adhere one of the bingo cards to your layout so it’s 2” from the top edge and 2” from the right edge. Cover the title of the bingo card with a 4½”x1-1/16” piece of the light blue grid paper so you can create your own custom title (see step #11).
5. Trim a piece of the red Dream Street paper to 12”x3¼”. Adhere this piece horizontally along your layout and directly on top of the striped paper so there is about a ¼” of the striped paper showing at the bottom and 5/8” showing at the top.
6. Cut a 2-3/8”x3” piece of light yellow lined paper from one of the small bonus sheets of paper to create a journaling block. Add a small sticker to the lower right corner of the journaling block. Adhere this journaling block and the three photos to the red paper, leaving an 1/8” of space between and above and below each photo/journaling block; adhere in the following order – photo, photo, journaling block, photo.
7. Cut off the blank part of one of the labels and set aside for future use (see step #11).
8. Take the stitched part of the label and use it, two of the journaling die-cuts and three stickers to create an embellishment cluster near the lower left corner of the bingo card. For added interest, add a piece of baker’s twine to one element in your cluster, add a couple staples and use some foam adhesive for dimension.
9. Punch a circle from the flowered Dream Street paper and adhere it to the upper left corner of your layout so it hangs off the edge; trim off the excess hanging off. Cut a heart freehand from the red Dream Street paper and run it through your embossing template. Adhere it with foam adhesive near the circle and add a sticker to complete the embellishment cluster.
10. Stitch a 9¼” horizontal line running across your layout, about 2¼” from the top of your layout and starting about 1¾” from the left edge of your layout.
11. Add your title to the top of the bingo card using a combo of the Scenic Route square alpha stickers and the Dream Street chipboard alphas. Back one letter in your title with a red-misted fabric heart that you cut from the blank part of the fabric label.
12. Add a green plastic paper clip to the upper right corner of the far right photo.
13. Ink three small chipboard dots with the orange ink and adhere in a horizontal line above the far left photo, within the striped paper.
14. Add your journaling to the journaling block. (I omitted this step because this layout is for a gift album and I want the recipient to add their own journaling.)
"Rose Garden"

1. Gather your supplies: Crop Addict April 2011 Monthly Kit, Crop Addict April 2011 Monthly Kit Option, five photos (one 6”x4½”, four 2”x2”), journaling pen, two colors of paint, two border punches, 1¼” circle punch, green, yellow & brown chalk inks and various adhesives.
2. Choose two chipboard flowers and paint them each a different color with paint. Set aside to dry.
3. Use the light blue cardstock as your base.
4. Cut a 2”x12” piece of the diamond-patterned brown Jillibean paper and adhere it vertically along the left side of your layout. Cut a ¾”x12” piece from the green Jillibean paper and then use a border punch to create a decorative edge along one of the 12” edges. Adhere this directly over the right edge of the brown paper, with the decorative edge facing left.
5. Trim a piece of the blue flowered-patterned Jillibean paper to 2”x10”. Take the second border punch and punch a decorative edge along one of the 10”-long sides. Adhere this piece of paper horizontally along your layout, decorative edge facing down so it’s 6½” from the top edge of your layout.
6. Mat your large focal photo on a 6¼”x 4¾” piece of the blue crisscross-patterned Jillibean paper. Mat your four small square photos each on a piece of 2¼”x2¼” text-patterned Jillibean paper. Ink all the edges of the photo mats with the brown chalk ink. Adhere your focal photo so it’s 1¾” from the left edge and 1½” from the top edge of your layout. Adhere your four small photos in a horizontal line below the focal photo; the top edges of these photos should be about 5 ½” from the top edge of your layout (they will overlap your focal photo). The farthest right photo should be 1/8” from the right edge of your layout and then space all the rest of the photos about 1/8” apart.
7. Adhere your two chipboard painted flowers near the lower left corner of your photos. Add a punched 1¼” green patterned paper circle, topped with the circle of bling, to the center of the larger flower. Attach a brad to the center of the smaller flower.
8. Use your journaling pen to draw journaling lines to the right of the chipboard flowers and below the patterned paper. Next, add your journaling.
9. Use the black alphabet stickers to add your title above the focal photo.
10. Fussy-cut the pink bouquet of flowers from the one sheet of bonus paper and use foam adhesive to adhere it in the upper-right corner of your focal photo.
11. Fussy-cut three birdhouses out of the Jillbean paper and adhere them in a line in the lower right corner of your layout. Use the green & yellow ink and your stamp set to embellish them.
Tuesday, April 5, 2011
I have a layout featured in the April 2011 Page Maps newsletter!
Yep! That's right! I finally got the email from Becky Fleck inviting me to create the sample layout for one of her sketches to be featured in the April 2011 Page Maps newsletter. I cannot begin to tell you how super excited I was. So I received this awesome sketch below to work with...

...and created the following layout. I broke into the new Echo Park papers I received for Christmas and dove into the photos from our November trip to Kauai. I had yet to scrap any photos from this vacation and this sketch gave me the perfect reason to start!

If you haven't ever seen Becky's sketches, then be sure to check out her site, Page Maps. She has sketches for layouts of all sizes including double-pagers, round pages and mini-pages. She also features new card sketches once a quarter. Not only does she have awesome sketches on Page Maps, she also has a couple books out with even more sketches and designs the layouts for Scrapbook & Cards Today magazine and their Project 12 yearly challenge. If you are a fan of sketches, then be sure to check these all out!
The fun Crop Addict April Kit is here!
I had such a blast working with the Crop Addict April kit! This kit is chock full of awesome supplies including beautiful double sided papers from Jillibean Soup, Carolee's Creations Adornit, and Dream Street. It also contains six coordinating sheets of Bazzill cardstock, including one sheet each of dotted Swiss and bling cardstock. A Maya Road strawberry mini-album, set of diecut alphabet letters, KI Memories glitter lace cardstock, journaling cards, Prima canvas tabs, file folders, brads, an ink pad, a clear stamp set, and a other miscellaneous goodies have also been included. You'll enjoy creating with this kit. All of this can be yours for only $48...but order fast because supplies won't last. Order now!
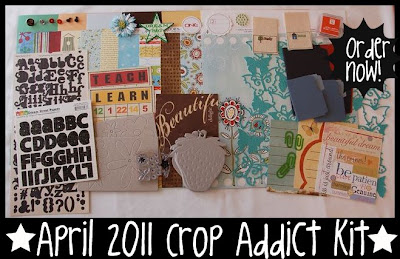
A fabulous April kit add-on is also available. It includes Carolee's Creations Adornit clear stickers and cardstock stickers, a Scenic Route square alphabet and a pack of Fancy Pants Big Board Chipboard. This kit option can be yours for only $14. Order it now too!

I created six fun layouts with this kit including a kareoke birthday layout, two layouts for a first year baby album, a layout about moving away from home, a Happy Hour layout and a layout about a trip to the International Rose test garden. Check out all these layouts below. I am saving the mini-album for a rainy day!
You can also check out what the rest of the Crop Addict Design Team did with this kit here in the Crop Addict gallery!
Tuesday, March 29, 2011
Reminder to all Crop Addict Blog Hop Participants...
Thank you for participating in Crop Addict's Social Media Blog Hop Event earlier this month.
We have a $5 electronic gift certificate waiting for you for participating. In order for you to receive the gift certificate you need to create a shop login, please follow this link to create your shop login so we can send your gift certificate.
Thanks!
Project 12: March 2011 Layout
Already got my March layout done even though the month isn't over yet. But, I knew this upcoming week was going to be pretty uneventful - other than scrapping every night! I pretty much copied this layout exactly...from the overall design down to the little tree and kite. I thought the whole concept of this sketch was fantastic and decided to utilize every bit. This was the first time I paper-pieced a kite for a layout, used my Sheltering Tree Gel-a-Tins stamp set and sanded freehand on Coredinations cardstock. I also like how the orange birds tie into the orange bowling balls in the focal photo. If you want to get involved in the Project 12 challenge, check it out here!


Monday, March 28, 2011
Project 12: February 2011 Layout
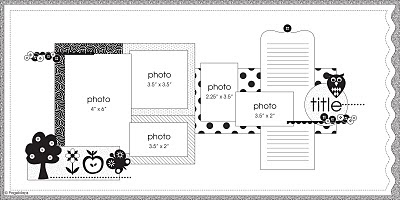
Another month of Project 12. I am having so much fun with this challenge and I have decided that I am definitely going back to complete this project at least back to 2008. I had fun with this month's sketch. At first I wasn't quite sure how to adapt the sketch to work with my photos but I think I still managed to keep the layout well-composed and follow the sketch even with a horizontal focal photo. I knew I wanted to use red as a primary color for February because of Valentine's Day but of course not one photo is actually from Valentine's Day. So I threw in some brown, green and variety of other colors to create this upbeat layout. If you aren't participating in Project 12, check it out here! It's never too late to start.

Saturday, March 5, 2011
Go Green with Eco-Friendly Scrapbooking Products!
There are so many ways to "go green" and conserve in your scrapbooking - use your scraps, use found items from around the house, use packaging on your pages, etc. But did you know there are scrapbooking companies that are also getting into to the eco-friendly cause by producing papers from recycled materials? And Crop Addict has an entire section in the store devoted soley to these green papers! There's a variety of papers from manufacturers like Die Cuts With A View, Jillibean Soup and Sonburn Designs. Check out some of the layouts that I've created with some of these eco-friendly papers!
Need A Creative Boost?
So when you are stuck in a creative rut, what do you do? Some of us browse online galleries, flip through scrappy magazines or study sketches to inspire us. Well, have you ever thought of trying a new technique? Expanding your creative horizons by trying something new is a great way to get the mojo flowing. So, if you are looking for a new technique to try, check out the Crop Addict Totally Technique Forum. It is chock full of various techniques to try - from DIY flowers, to simple ways to add a finishing detail to your layout, to fun altered art projects, to photo editing tips. And to help you navigate the forum, we even have a technique index (updated monthly) for reference. Here are just a few of my favorite techniques you can find in the Totally Technique Forum...
Colorizing Parts of a Photo using Photoshop Elements (courtesy of croppycatter)
Paint Splatter Technique (courtesy of brandyseitz)
Fabric Flowers (courtesy of buzzkiss)
String Art (courtesy of "Yours Truly" aka daisymeh)

Have fun exploring the Totally Technique forum! Hopefully you'll find some new techniques to try or rediscover some old ones you haven't used in awhile. If you try one of the techniques in the forum, be sure to share your layout here, on the Crop Addict FaceBook page or in the Crop Addict gallery!
Subscribe to:
Posts (Atom)


